Hello Students,
Your next module is a physical exercise in creating examples of the earliest forms of animation. This module will create an understanding the illusion that makes animation possible, this is called "Persistence of Vision".
Animation History Project 1: Creating a Thaumatrope
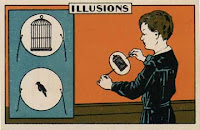
- Make a thaumatrope using the materials available
- Think of an interesting 2-frame animation idea and create a handmade thaumatrope device, it can be created digitally and printed out or by drawn by hand
- You will turn in a physical example of your thaumatrope.
- Due at end of class today!
Animation History Project 2: Creating a Phenakistoscope
- Create a phenakistoscope using the materials available
- Follow the lesson details outlined in the CTEOnline curriculum for creating a "Spindle Viewer". This lesson contains a template which may be printed and used
- Think of an interesting 16 frame animation, it should be able to loop seamlessly if you are successful
- Your animation can be drawn by hand, created digitally or with photographs, your imagination and skill level is the only limit
- You will turn in a physical example if your phenakistoscope along with an animated GIF file of your phenakistoscope. We will learn how to make animated GIF's with Photoshop before you turn it in.
Links:
Phenakistoscope Instructions
- Obtain or print up a copy of the phenakistoscope template
- Sketch your animation very lightly in pencil, make sure to keep your artwork consistent and evenly spaced for best results. Make sure the scale of your characters or artwork is consistent.
- Spin your template for a quick preview of what your animation will look like, adjust lines or artwork if needed
- Once the artwork is complete, ink the sketched artwork with a dark pen. Felt tip pens are best but any will work. Make sure the lines are bold and easy to see for best results.
- Scan your template with the scanner and transfer to your computer
- Open your scanned image with adobe photoshop
- Create a new layer and set the blending mode to darken. On this layer paint color over your artwork with a brush/pencil tool. The blending mode "darken" will allow your line art to show through the color you added
- When the color layer is complete flatten your image to make the color and artwork into a single layer. Save a copy of this to preserve your original layered file.
- Open your flattened image and open the animation palette in photoshop, set the palette to work in frame mode.
- Create 16 layers of your template, rotating each layer so that it is aligned and ready for animation
- In the animation palette sub menu, select "make frames from layers" and your layers will be cast across the timeline in the animation palette
- Adjust your duration and delete any frames that don't belong.
- Hit the play button to see your animation, adjust speed/duration if necassary
- Export a GIF files to make an animated web safe file
- Make sure the GIF looks good and is set to loop "forever"
- Make sure you add your first and last name to the file and turn it into my external hard drive or copy to my laptop.
Due by end of class Monday
Have fun! - Mr.W


No comments:
Post a Comment
Note: Only a member of this blog may post a comment.