Thursday, January 30, 2020

Explore AE: 20 Filter Exercise


Hello Students,
Motion Graphics is a technique that is used to bring graphics, animation and 3D content to life. It is used in commercials, production, movies, animation and more. From the most complicated animated feature film to a simple logo animation, motion graphics makes it happen.

Tutorials - After Effects for Beginners:
Read and work through these tutorials to gain an in-depth understanding of the After Effects workflow. Don't skip any steps or skim over the material, read each and every paragraph and try out the steps yourself. Be thorough, you will be calling on these skills for the next assignment. Work through all, from intermediate to advanced.
Motion Graphics can blur the line between video, art and animation


20 Different AE Effects Assignment Details:
  • Find a short clip from one of your previous projects, output a 3-5 second clip of video from Final Cut. Use the Export > Quicktime function for best results.
  • Launch Adobe After Effects
  • Go to File > Import > Files and navigate to your clip
  • Drag your clip into the timeline and set up a composition
  • Explore the Effects menu, pick one while your clip is selected in the timeline to apply that effect
  • You can use Command-D to duplicate a clip, you can also Option-ClickDrag to make a copy.
  • Use the Text Tool to create a text object and type in the name of the Effect, shorten the Text Objects Layer in the Timeline so it only appears for that specific clip. Repeat for each clip.
  • Apply 20 different Effects to 20 different clips... explore the effects palette to modify the Effect's parameters. 
  • When done, set up your in/out markers and use Command-Control-M to "Make" a movie. You will see the Render Que... hit the Render button to save your movie.
  • Transfer your movie to my laptop via thumbdrive to turn it in
  • Files are due before end of class monday
Grading for a total of 10 points:
2.5 Points - All 20 clips created with effects
2.5 Points - Effects have labels
2.5 Points - Quicktime movie turned in and is proper video format
2.5 Points - File turned in on time

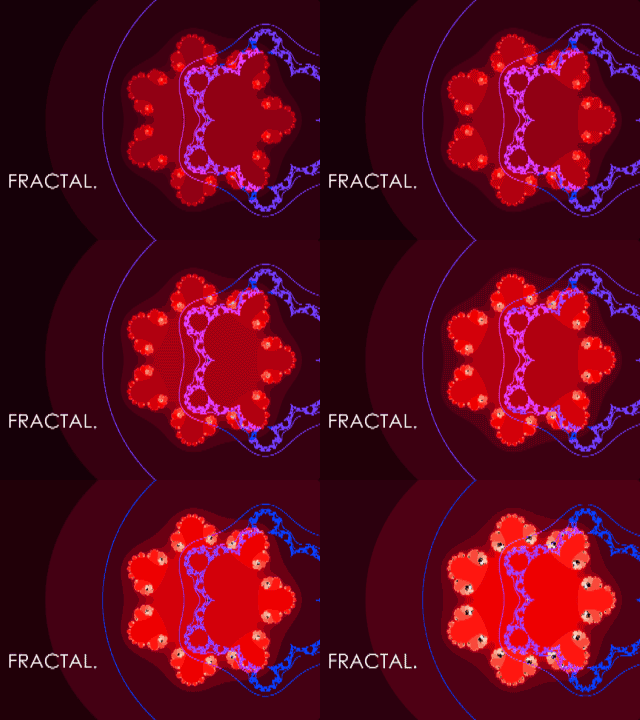
AE Effects Samples:


Have Fun!


 - Mr.W

Friday, January 24, 2020

Modern Motion Graphics: Introduction to Animation with Key Frames in AE

Hello Students,
To re-inforce our newly developing skills in After Effects (AE) we will revisit the effects and animation tutorial to create a short series of sample animations that demonstrate different capabilities in AE.

Tutorial Link: AE for beginners - effects and animation

Animation Basics Project:
In this project you are required to read the tutorial link above and create examples of different methods and techniques of animating with AE. Your animation should use simple solid shapes or images, the key is to simply demonstrate each technique listed below. Keep your sample animations short and to the point. Total running time for project should be kept under 2 minutes.

  • Open up the link above in a web page
  • Launch AE and create a new HD composition
  • Create an animation sample using simple solid shapes or images for each of the following listed below
  • Work with your classmates to share information and discoveries
  • When complete export your sample animation movie and turn in to the external HD
  • If you are unsure refer to the tutorial page, it lists all the methods to create these samples

Create a sample key framed animation that demonstrates the ability to transform:

  • Position
  • Opacity
  • Scale
  • Rotation


Create a sample animation that demonstrates the ability to alter the velocity of a keyframe:

  • Easing into a keyframe, to slow down
  • Easing out of a keyframe, to begin slowly and speed up


Create a sample animation that demonstrates:

  • Parenting of 2 objects
  • 2-3 objects that overlap each other and show blending modes applied to change how objects blend together
  • A masked object
  • A masked object with a feather applied to the mask
  • A masked object where the mask is animated


Tuesday, January 21, 2020

Traditional Animation Origins: Thaumatropes and Phenakistoscopes

Hello Students,

Your next module is a physical exercise in creating examples of the earliest forms of animation. This module will create an understanding the illusion that makes animation possible, this is called "Persistence of Vision".

Animation History Project 1: Creating a Thaumatrope

5 Minute Research Exercise: 
  • Who was Ptolemy? What did they observe about optics?
  • Who invented the Thaumatrope?  What year was the Thaumatrope invented?
  • Who Studied the "Fusion of Colors" and what other discovery did this person make?
  • What visual phenomenon does the Thaumatrope demonstrate?
  • Name 2 other Victorian era animation methods and describe how they work.
  • Make a thaumatrope using the materials available
  • Think of an interesting 2-frame animation idea and create a handmade thaumatrope device, it can be created digitally and printed out or by drawn by hand
  • You will turn in a physical example of your thaumatrope.
  • Due at end of class today!

Animation History Project 2: Creating a Phenakistoscope

Practice:

  • Download 2-3 examples from an online resource such as: publicdomainreview.org
  • Use the Instructions below to create an animated version in After Effects. You will need to count the number of frames to create the correct number of rotations and frames in your After Effects composition, experiment to figure it out... 


Make your own:


  • Create a phenakistoscope using the materials available.
  • Follow the lesson details outlined in the CTEOnline curriculum for creating a "Spindle Viewer". This lesson contains a template which may be printed and used.
  • Think of an interesting 16 frame animation, it should be able to loop seamlessly if you are successful.
  • Your animation can be drawn by hand, created digitally or with photographs, your imagination and skill level is the only limit.
  • You will turn in a physical example if your phenakistoscope along with an animated GIF file of your phenakistoscope. We will learn how to make animated GIF's with Photoshop before you turn it in.

Phenakistoscope Instructions
  1. Obtain or print up a copy of the phenakistoscope template.
  2. Sketch your animation very lightly in pencil, make sure to keep your artwork consistent and evenly spaced for best results. Make sure the scale of your characters or artwork is consistent.
  3. Spin your template for a quick preview of what your animation will look like, adjust lines or artwork if needed.
  4. Once the artwork is complete, ink the sketched artwork with a dark pen. Felt tip pens are best but any will work. Make sure the lines are bold and easy to see for best results.
  5. Scan your template with the scanner and transfer to your computer.
  6. Open your scanned image with adobe photoshop.
  7. Create a new layer and set the blending mode to darken. On this layer paint color over your artwork with a brush/pencil tool. The blending mode "darken" will allow your line art to show through the color you added.
  8. When the color layer is complete flatten your image to make the color and artwork into a single layer. Save a copy of this to preserve your original layered file.
  9. Open your flattened image and open the animation palette in photoshop, set the palette to work in frame mode.
  10. Create 16 layers of your template, rotating each layer so that it is aligned and ready for animation..
  11. In the animation palette sub menu, select "make frames from layers" and your layers will be cast across the timeline in the animation palette..
  12. Adjust your duration and delete any frames that don't belong.
  13. Hit the play button to see your animation, adjust speed/duration if necassary..
  14. Export a GIF files to make an animated web safe file..
  15. Make sure the GIF looks good and is set to loop "forever"...
  16. Make sure you add your first and last name to the file and email or airdrop it to your instructor.

Have fun! - Mr.W

Semester Conclusion

Thank You Video Production Class of 2019
Thank you to all my great students from this years Video Production and Animation class. There were some very impressive portfolios and projects and I thank you all for your hard work and dedication.


This blog will go live again for the Spring semester 2018-19. See you then!

- Mr.W

Thursday, April 25, 2019

Demo Reel Project

Students,
As part of your final you will produce a high energy demo reel that showcases your work during the semester.


Demo Reel Project:
Having a compelling demo reel is a key component in communicating your talents and digital media skills to potential employers and clients. You final project is to create a demo reel that showcases your skills. Read: Tips on creating a demo reel

  • Choose a short and high energy piece of music to edit your demo reel to, make sure you have this ready before you begin editing
  • Launch Adobe Premiere and begin adding all of your rendered animation assets and video projects from the semester (work from other classes or prior semesters/independent work is allowed)
  • Create an intro slide plus an ending title slide with your name and email/contact info
  • Edit your slides, images, animations and videos to your music, make sure to edit on the beat of your music track to keep it compelling
  • Demo reel music and action should crescendo towards the end
  • Keep the demo reel down to 1 minute or 1:30 approximately
  • Include tails
  • Turn in via NAS or SNET in full HD H.264 with 10Mbps Data Rate
Have fun!

- Mr.W

Friday, March 29, 2019

The Big Video Project: Choose Your Destiny!

Hello Students,
This project along with your portfolio will make up your final. This last video project is a free style, you can create the project you want to, but I expect it to reflect the skills and knowledge you have been granted over the course of this class. Your video project, no matter what form it takes, should show good editing, smooth camera work, good use of transitions, tell a story or deliver information in an entertaining fashion. There should be well crafted titles and credit rolls at the beginning and end of your project. You should find ways to utilize the motion graphics and animation skills to enhance your project in appropriate ways.

What Project will you make? :
It is up to you to decide what project you would like to complete for your final. You must make sure that you can accomplish this project with the time we have left in class. It is possible to create 2 short documentaries instead of a long form documentary. You are expected to utilize all skills developed in the project for planning, creating, editing, crafting title animations and visual effects, sound and sound effects and presentation as a production with accompanying materials is required.. Time management is crucial.
Here are some ideas for projects:
  • Original Narrative or Drama, Science Fiction, Mystery, Etc...
  • Documentary project
  • Comedy Skits/Shorts/TV Show
  • Experimental Video
  • Music Video
  • 2D Animated Short
  • 3D Animated Short
How to Get Started! :
  • Build a team of dedicated filmmakers, actors, artists and camera operators to participate in your project
  • Decide on a concept/idea for your project
  • Write a full page proposal to get approval from your instructor before proceeding
  • Create a storyboard, shot list or script for your project... whichever suits your project best and get approval from your instructor before filming begins. 
  • Schedule your shoot, decide on locations, check out equipment, gather costumes or props if needed, make sure everyone on your team is on board and begin production
Project Requirements:
  • Each team is expected to complete:
    • 1 page proposal for project complete with all project details, subjects, locations, summaries, storyline, content, special effects, etc...
    • A storyboard, shot list or script that clearly describes the project, scenes, transitions, special effects, audio, camera angles, action, dialogue.
    • A well edited final project free of technical errors.
    • Well designed, animated title sequences and credit roles that are appropriate to the film subject or style and some use of motion graphics, special effects to enhance or create transitions or scenes in the project.
    • Each team must completed a press kit with biographies
    • Each project must create an animated production logo
Schedule for Final Projects:
  • Project proposals should be done and approved by April 17th
  • Storyboard/shotlist/scripts should be done and approved by April 22nd
  • Preliminary shooting should be completed by May 10th
  • Rough Cut should be complete by Friday May 17th
  • Final Project completed with Press Kits by May 31st
  • ROP Portfolios with Demo Reels Due June 4th
Grading and Evaluation:
  • You will be graded against the Video Production Rubric. Familiarize yourself with it to achieve maximum points.
    • Summary:
      • You are expected to have a clear description of what your project aims to achieve and each team member should have a clear definition and fulfill their roles effectively
      • You are expected to have a storyboard, script or shot list that illustrates your project clearly with beat, structure, transitions, special effects, sound effects, audio tracks, lower thirds, titles, etc
      • The content should have a clear statement of purpose or theme and be a quality creative work.
      • Your completed project is expected to have all elements defined, be well edited and be free of technical problems.
      • Teams are expected to met, discuss and contribute to the project, and work with respect for each other.
      • All deadlines are expected to be met.

Biographies, Press Kits and Logos: 
Each filmmaking team is responsible for assembling a press kit and writing the biography for their film. These materials are used to distribute the project to film festivals and for publicity.

Biography:
A biography is a brief, third-person description of the filmmaker(s). Information that is typically included in a biography includes: place of birth, place of residence, educational background, past projects, current projects, areas of interest.

A sample biography:
Jason Jakaitis is a filmmaking student at San Francisco State University and a graduate of UNC-Chapel Hill’s Master of Arts program in Communications Studies. Born and raised in San Diego, he currently lives in the Upper Haight area of San Francisco. In 2007, Jason was awarded a Murphy Fellowship from the San Francisco Foundation, as well as a Personal Works grant from Film Arts Foundation and a New Filmmaker grant from Panavision. Jason's previous film, minutiae, is a 16mm narrative short that was awarded Special Jury Prize at the Portland International Short Short Film Festival, and screened at the 2007 Mill Valley, Humboldt and Santa Cruz film festivals.

Logos:
Your team must produce a logo for your “production company”. This logo could be hand illustrated or created with motion graphics but it must show strong technical skill and be effective and creative.

Press Kit:
Depending on the project, press kits can be composed of a variety of different kinds of information, but the overall goal of the kit is always the same: to provide the individual with as much relevant information about the film as possible. This information can then be used in articles, in film festival schedules, online “blurbs” and any other way that a festival would choose to promote the film.

Download and read a real press kit: Press Kit for  the film Some Kind Of Wonderful
Check out this press kit: Quivir Press Kit
Check out this press kit: Cave of Forgotten Dreams Press Kit

Press Kits require the following: 
  • Two or more still images from the film itself 
  • Two behind the scenes production stills taken with a camera, cell phone cam, ipod camera, point and shoot, etc 
  • One “headshot” photo each of the filmmakers and actors
  • A one paragraph (3-4 sentence) synopsis of the film
  • A one paragraph biography of each filmmaker 
  • You can assemble your press kit using google docs, pages or word, indesign, photoshop or illustrator and turn it in as a PDF file

Ridley Scott and Harrison Ford, behind the scenes production still from the film "Blade Runner"
Production Still from the film "Blade Runner"
Original Press Kit from the film "Blade Runner"


Behind the Scenes Production Still from Werner Herzog's "Cave of Forgotten Dreams"
Production Still from Werner Herzog's "Cave of Forgotten Dreams"


Good luck Filmmakers!

- Mr.W

Wednesday, March 20, 2019

How to Write a Good Great Resume and List of References

Hello Students,
Having a solid resume is the cornerstone developing your career. A well written and well designed resume is what sets you apart from other job applicants. A perfectly written job application, a quality resume and a list of positive references is the job seekers trifecta. In this class we will teach you these skills to help in your search for employment. Below is a list of resume writing tips, read over it before finalizing your own resume.

Link(right click to download): ROP PORTFOLIO HANDBOOK

Resume Writing Tips:
Put your typography skills to work:
Never use comic sans, zapfino or anything difficult to read or is more "expressive" than "rational". Use sans-serif for headers and section titles, pick a complementary serif font for all other text. Limit your fonts to 2, with 1 or 2 modifiers (bold, italic, etc). Also, refer back to our rules on typography in our introduction to typography and utilize those guidelines in your resume. Choose fonts that are complimentary to each other and assist in creating information hierarchy, this helps the reviewer find the information they need quickly. Choose a good sans serif font for your section titles and a complimentary serif font for the rest.

Have an objective:
Know the purpose of your resume and edit it for different job scenarios. Having a focused job objective listed on your resume will help you with attaining an interview and getting hired.

Back up your special skills with job experience:
List your skills but make sure your listed job experience, training or education reflects those skills. Are you really good at making websites? Let them know how and where you learned that skill.

Research and use the right keywords:
Every industry has its own language, research job offerings and pay attention to the keywords that are used. If you put your resume online with a job placement service they will often use certain keywords to search their database for potential hires.

Be descriptive with job experience:
A job title will communicate your role, but not the details of your work experience. List the duties, tasks, activities, skills and achievements that were part of your job.

Format your text:
Use bold text to start each section. Use bullets for lists. Make the document easy to quickly scan and read. Clarity of format is crucial, you have ten seconds before the employer will move on to another applicant.

List most recent job experience first:
This also goes for education, list the most recent first. If your still in High School you can say "future class of 2012", or "Currently attending HS".

List most important skills first:
When writing out your skill list make the most important skills the first ones on the list. If you are applying for a web design job, list your web skills first. Change and edit this for different industries/jobs.

Leave out the obvious:
It is not necessary to add "available for interview" or "references available upon request". References are standard and expected, and of course you are available for an interview. Thats the whole point!

Avoid negativity:
Don't trash talk past employers or state that you didn't like a past job. Simply state that you were looking for future opportunities.

Go with what you got:
If you haven't had work experience yet, just list any summer jobs, volunteer experience etc. If you have hobbies that are relevant to the job you can list those. If you don't have a diploma or degree then just list your estimated date for completion.

Proofread your resume:
Have your neighbor or classmate read your resume. Sometimes the spellchecker doesn't catch typos. The more eyeballs that see your resume before it gets in the hands of the employer the better.

Although these resumes contain similar information, styles do vary. Focus on what makes a resume readable, identifiable and effective. It should be unique to stand out from the rest, but not overly expressive as that can make legibility difficult.
  • Download the ROP Career Portfolio Handbook and follow the template to write your own resume from scratch
  • Create a 1 page resume that meets the handbook requirements for all included information
  • Use any program or online tools of your choice to write your resume
  • Demonstrate good typography, spelling and accuracy! 
  • Make sure your resume shows good information hierarchy so it is simple to read and each section is listed clearly
  • Email or print and turn in your resume  and list of references for credit - DO NOT POST YOUR RESUME ON YOUR BLOG! It contains sensitive information!
  • Due Wednesday

List Of References Writing Assignment:
It is incredibly important to develop a great list of references. These references will help you obtain jobs, college admissions or acceptance into special programs.

Who makes a good reference?
  • Teacher
  • Coach
  • Counseler
  • Present or past employer
  • Family friend
  • Anyone that can speak highly of your abilities, skills and worth

References to avoid:
  • Anyone under 18
  • Personal friends
  • family members
  • Anyone who cannot speak highly of your abilities or skills

Important Tips:

  • The format of your references should match your resume exactly, same header, same fonts.
  • Do not include references on your resume
  • Include at least three references
  • All references should be responsible adults who know you well and can speak to your character and skills
  • Always ask whether or not someone is willing to be a reference before including them in your list
  • Verify the contact information before handing over to an employer

Format:
Use the following format for your references, using your own accurate information of course:

Persons Name:   Bob Smith
Address:            123 Fake Street
                          Santa Cruz Ca, 95060
Phone #:             (831) 555-4321
Title and              Business Owner
work place:         Moland Spring Bottled Water

Grading:
Your resume's and reference lists are graded assignments. For a total of 10 points, grading is as follows:
2Pts - Resume and List of References is complete per Handbook Guidelines
2Pts - Resume and List of References is well formatted and easy to read
2Pts - Resume and List of References contains no typos or errors
2Pts - Resume and List of References are two separate documents with consistent style, font and header
2Pts - Resume and List of References are emailed to me as PDF files with descriptive file names (don't send a file called "untitled.pdf")

Have fun!

- Mr.W