Wednesday, April 1, 2020

Documenting Reality - Solo Filmmaking

Documentary filmmakers don’t “write” the stories… life does. We all love a good story. And when a story is true… it becomes all the more intriguing.

Documentary films bring important topics to the table in a captivating way that also sparks conversation, and sometimes even social movements. They are a perfect platform to create dialogue.

In the last few weeks, COVID-19 has directly and indirectly impacted our lives. While the number of cases in our county remains small at this time, a continued response may be required.  This is not a vacation. We will continue with our lives and our schoolwork, but it will be different than most of us have experienced. We will be doing our work from home. And with each day, the information we have regarding how we as individuals, as a town and as a global community are asked to go about our routines may change.

If you choose, your assignment during the school closure is to document your experience. You will use this footage to create a short documentary as a final project.

How will you do this? Use each bullet point below to capture the week in a variety of ways. This will help give your story structure. It will also be the rubric for how it is graded. 

  • Daily Vlog. Over a couple weeks... spend 5 minutes recording a “direct address” into either a web camera, your phone* or a DSLR camera that you check out from class. Refer to the daily check-in questions for what you should cover in these daily vlogs. *NOTE: IF USING A PHONE, ALWAYS HOLD IT HORIZONTALLY!!
    • Daily Check-In Questions  QUESTIONS FOR YOUR DAILY VLOG & INTERVIEWS:
      1. What day it is?
      2. Is there anything notable about the day (personally and/or globally)?
      3. Tell a story about something that is happening today (personally and/or globally)? 
      4. What is it like having school closed? 
      5. What do you plan to do today?
      6. What are the biggest challenges? 
      7. What did you plan to do yesterday and how did that turn out? 
      8. Any observations about how the experience is affecting you? 
      9. What didn’t you expect that is happening?
  • Interviews: Over the course of the week you will need to conduct at least 2 interviews with the people around you. The more you check in with this person the better, but 2 interviews (one at the beginning of the week and one at the end at a minimum). 
  • B-Roll: B-Roll footage is the shots you will insert into your edit. B-roll can be shots of your room, close-ups of objects throughout your house, your yard, a clock on the wall, empty hallway. If you’re going outside gather shots of your neighborhood. Think of how these images will support what you’re saying in your vlog. These are the shots that evoke something about the truth of the situation you are filming. Hold your shots still. Don’t move the camera too much. Record 8-12 seconds for each B-roll shot. These are the basic types of B-roll shots that you’ll want to search for:
  • Story Telling Shots – screen captures of the news, interiors of the locations you film your interviews, shots of you entering and leaving rooms, cooking in the kitchen, doing your homework, your neighborhood… All these shots allow you to tell your story without always having to use narration. 
  • Emotional Cutaways – Since movies have the unique ability to make people feel, construct emotional sequences. Do this by looking for shots that have emotional content built into them. For example, a solitary man sitting on a park bench, a close-up of a hand while cooking, reading, sewing, praying, a shot of washing hands, preparing food, etc. Where are you spending your time in response to the school closure? Show anything related to that. 
  • General Coverage -  These are very important. This is a time for you to create context. If you have a radio or television playing news coverage of COVID-19, capture it. If you have people watching or listening to the news, cover that as well. Be sure to get the shots of the TV or Radio as it plays the news AND shots of the people watching. Even if it seems boring, these are important shots to your narrative. Get shots of your pets! They will be totally oblivious to what’s happening and that makes a statement, too.
  • CLOSE-UPS - You cannot edit together all wide-shots or all medium shots. You need to insert close-ups between shots in order to avoid unintentional jump cuts. Be sure to get close-ups, lots of close-ups! 
  • Observational Footage – observational footage is simply that – observational. These shots allow your audience to feel like they are watching a scene unfold in realtime. It draws them in and helps change the modality of the experience for the viewer. 
  • Process Footage – This is when you film the filming. You can do this by filming into the mirror, reflections, or if we hear your voice off-screen, or hand the camera over to a family member to film you for a bit. 

Sound: A note about sound… whenever possible before you start filming listen to the sounds around you.
  • Choose a quiet place for your interviews.
  • Turn off fans, air conditioners, washing machines, radios, etc. 
  • Close windows if noise from outside (lawnmowers, traffic, etc.) is audible. 
  • Keep the camera close to your subject to make sure the on-camera mic can pick up clean audio of what they are saying.
For now your goal is to record, create footage and content... store it... share small examples each week with the class and begin to edit a story from it all... and the story is up to you, it can be about your experience... you can turn it into a fictional piece...  make your voice heard.

- Mr.W

Monday, March 30, 2020

This class has migrated to the Interwebs!

Hello Students,

This class has moved online, to join our remote studies email your instructor for the class code...


“Computers are useless. They can only give you answers.” 
― Pablo Picasso

Monday, March 2, 2020

Experiment with Maya Physics and Render a Simulation

Hello Students, 
Your next project is an exploration of Maya Physics. Maya uses a soft/rigid body system and different fields that can modify the interactions of these simulated objects, these fields are things like gravity and wind.... 

Maya Physics Experiment:
Objective: Learn how to use physics engines for complex 3D animations, repeat and experiment for visually interesting interactions. Render with Mental Ray and Image Based Lighting and Layered Shaders for your demo reel.

Your assignment is to follow the simple tutorial below, then create a fun physics experiment and then render it. Don't get too elaborate or your computer will take weeks to complete the calculations in your simulation, keep the number of objects under 20, more will slow down the calculation speed potentially. Use all the skills you have developed up to now to set up your 3D file with a proper project folder, render settings, materials, image based lighting etc.... just as we did in the cornell box project.

Part 1: Basic Physics Simulation

  1. Launch maya and make a new file
  2. Give your timeline at least 500 frames and zoom out the timeline so all frames are visible in the timeline
  3. Create a cube and shape it into a flat  surface like a table
  4. Create another cube, along with a sphere and a third shape of your choice
  5. Arrange the new shapes in a column that is positioned over your first flat table shape that you made
  6. Select the table shape and press down on the spacebar to bring up your marking menu, select "Soft/Rigid Bodies" and choose "Create Passive Rigid Body"
  7. Now Select the column of objects, the cube, sphere and third object of your choice and then press the spacebar to bring up your marking menu again and choose "Soft/Rigid Bodies" and select "Create Active Rigid Body"
  8. With your 3 objects still selected go back to your marking menu... this time select "Fields" and choose "Gravity"
  9. Press the play button to see your objects fall from the gravity and bounce on the tabletop
  10. Congratulations! You just made a physics simulation in 3D!


Part 2: Make Something Awesome
With a little ingenuity and some basic knowledge you can make a really cool simulation, try using more shapes or different types of platforms and passive solid bodies for interesting results. You can give passive objects a pivot point so they spin when hit. You can add a few keyframes to an active rigid body to launch it in a certain direction.  Here are some ideas you can do with just basic knowledge:
  • Make a wheel or sphere roll down a ramp and into a jump
  • Create a Newtons Cradle
  • Make a wheel or sphere roll on a track
  • Make an obstacle course for a sphere to roll down
  • Make bowling pins and knock them down with a sphere
  • Make a brick wall and knock it over
  • Make a tower of bricks and blow it over with a wind field (or sideways gravity!)


Part 3: Render Your Simulation
  • Once your simulation is perfect make some materials for your objects, make some shiny, some glassy and some have a matte surface
  • Set up a project folder for this simulation file, make sure you create the file directory first then "set" the project to that new directory
  • Turn on Mental Ray and load up your best settings, use an image based lighting setup to add some good realism to your scene
  • Render your scene and turn it in as a video file to mad max when it is ready


Monday, February 24, 2020

3D Modeling Challenge

Hello Students,
Your project goal is to model an object with Autodesk Maya that is complete with some details materials and/or textures. 3D modeling is becoming an integral part of digital media studies and is used in everything from cinematic CGI, marketing, music videos, video games, prototype development and of course the new hot trend of 3D printing. Strong modeling skills can fit you into a high demand job market in many different industries.

"I Built My Own Coffin" 3D Hotrod model created by Seth Wilson
Modeling Challenge:

Start small and work with simple objects and primitives to "assemble" a real world, or otherwise... object... science fiction is fair game. Use your imagination...
  1. Read through the Maya User Guide sections on POLYGON and NURB modeling and try out as many methods and techniques as possible. Having a good understanding of these areas are key to being able to make and create unique shapes that are the sum of any object.
  2. Follow the tutorial videos on Box Modeling and Smoothing provided by the instructor. Watch, pause and try the steps to create an example model such as the claw hammer. (DOWNLOAD FROM NAS)
  3. Decide on an object to model and begin by creating the simplest part of the objects and move up to adding more complexity and detail as it takes shape. Utilize both Polygon and NURBS when needed. Having a reference object is a great idea, or having a gallery of images to reference can help too. If you are not confident with your modeling skills you could look up a tutorial and use that to accomplish your modeling.
  4. When your object is complete begin creating materials and textures for it with the Hypershade window. Complex materials can be mapped onto an object by using the UV Texture Editor and creating a Photoshop Network file, this is how much of the texturing is done in video games and cinematic CGI.
  5. Create a camera for your scene and set up Arnold with a Skydome that uses a HDR Light Probe for extra realism. Use the Arnold setup from our Cornell Box project.
  6. Test your renders and adjust as needed for best results.
  7. Render multiple views of your model and time permitting create a 360 degree rotation animation to accompany your final renders and post to your blog when complete. 
  8. Render in 1920 HD resolution.
  9. Post your claw hammer, practice objects and your final rendered model to your blog when complete....

"Minion" Created by Josh Booker, from a Maya Tutorial

Due in 2 weeks.


- Mr.W

Tuesday, February 18, 2020

The Cornell Box and rendering "Radiosity" with Arnold

For this project you will be getting more familiar with the workflow and methods in using Autdodesk's Maya to create a 3D scene with objects, lighting, a camera and textures. You will then render this scene and adjust quality, then render an animation to learn the basics of keyframing and render settings as well.


Cornell Box Project: Lights, Camera, Action!

History of the Cornell Box: The Cornell Program of Computer Graphics has become best known for its research on physically based rendering. They believe that computer graphic simulations will never become predictive of reality unless we correctly model the physics of light reflection and energy propagation within physical environments. The Cornell Box experiments have come to symbolize our approach to physically based rendering, it is a simply physical environment for which they have measured lighting, geometry and material reflectance properties. Digital, or synthetic images of this environment are created and compared to confirm accuracy of our simulations with 3D software.

A photograph of the original physical Cornell Box.
For this project you will create a scene to simulate the Cornell Box. You will create an environment, objects, textures, a light source and explore the rendering software available in Maya to try and recreate the photo we see above.

A Cornell Box created by Seth Wilson using Maya. This scene contains the famous Utah Teapot. Textures are made with blinn, lambert, phong, the light is a point light using depth map shadows, the scene was rendered with Mental Ray
Cornell Box Project Part 1: Creating The Scene
  1. Open Maya and create a new scene
  2. Create a cube that is perfectly square, turn on Component Selection and delete the front face of the cube so you have a box
  3. Create 2 more cubes and scale/stretch and move them into position to act as your pedestals in the scene
  4. Create a cylinder, sphere, triange or cone and other primitive objects and arrange them in your scene as above using the move and scale tools
  5. Create a cube and flatten it with the scale tool, position it on the roof of your box to act as a "light" later on
  6. Open your Hypershade window (Window Menu/Rendering Editors/Hypershade) and create 2 materials using the Lambert material, make one have a red color and one green. Double click the material to see the material settings
  7. Select your box and turn on Component Selection, select the right face inside the box and apply your red Lamber material, then select the other side and apply the green Lambert material. Select the face first, then right-click on your Material and choose "Assign Material to Selection" to apply it to that face
  8. Create a point light and move it to the top of the inside of your box using the move tool. Turn on "Use All Lights" in your view options to see it affect your scene
  9. Render your scene and check the quality, if your light is illuminating the scene your are doing great!
  10. Close your Render Window
  11. Open your Hypershade window again and create different materials for each of the objects in your scene, try a blinn, a lambert, a phong and try creating a 2D texture such as a checkerboard patter
  12. Select an object first, then right-click on your Material and choose "Assign Material to Selection" to apply it to that object
  13. To make your roof light cube glow, create a blinn material and set it to have a white color, set the illumination to half way to make the object bright, scroll down to the Special Effects section of the blinn material and set the Glow Intensity to 0.010 and apply the blinn to your roof light cube
  14. Under the Create menu, create a Camera
  15. Change your view point to see through your camera, it will be called Camera1 and it is under the Perspective submenu in the Panel menu of your view window
  16. Center your camera to view your scene straight on
  17. Click the render button to see what you get! Compare with your classmates results


Cornell Box Project Part 2: Render Settings

  1. Use the Arnold renderer and Arnold material pack to add materials to your scene.
  2. Edit your render quality, render and adjust for best results.
  3. Use Arnold Lights for best results in your scene


Cornell Box Project Part 3: Animate Your Camera

  1. Spend some time fine tuning your render and scene to make sure it looks it's best, adjust lights, textures and positioning before proceeding
  2. Bring up your camera view and center it on your box with the camera move tools
  3. In your time line enter 120 frames into the duration field and drag your time slider out so all frames are visible in your timeline
  4. On frame 1, with your camera selected (you can select it by clicking on it in the outliner or another view window) press the "S" key to create a keyframe. A red line will appear on your timeline to show that a keyframe has been created
  5. Slide your time line down to frame 120 and then use the camera move tools to zoom your camera into your scene, add a slight pan to your camera move as well to add a little dimension.
  6. With the camera still selected press the "S" key to make a second keyframe on your timeline
  7. Press the play button to preview your camera move and adjust if needed, you should have a nice slow movement like the one above
Cornell Box Project Part 4: Set Up Your Project Folder

  1. Rendering an animation requires setting up a project folder which contains your maya file and a set of folders for containing all the required materials, files and assets in a maya project. Your project may not utilize these resources but maya needs this file/folder structure anyway and it is not possible to render animated frames without them
  2. Close Maya and make a new project folder on your computer, place your cornell box maya file inside it and open the file by double-clicking on it.
  3. After your file is open go to the File Menu / Projects / New and your will see the project set up dialog box
  4. In the Name Field type in a name for your project, this should be something like CornellBox_Project
  5. Verify that the location is correct, click browse and navigate to your project folder if needed
  6. On the bottom of the dialog box, click Use Defaults and you will see the folders names being created
  7. Click Accept to complete
Cornell Box Project Part 5: Render Your Animation

  1. With your maya file still open, go to the Window Menu / Rendering Editors / Render Settings
  2. In the Common Tab set up your options for your animation. under File Output set the Frame/Animation ext to name#.ext
  3. Set Image Format to Maya IFF
  4. Scroll down to Frame Range and enter your start and end frames, start should be set to 1 and end should be set to 120
  5. Scroll down and set Renderable Camera to Camera1, your animated camera
  6. Choose your image size from the preset pull down menu, I used a 1K Square image for my own example above
  7. Close the Render Settings window
  8. Press and hold the Space Bar to bring up the Maya Marker Menu, click on the Render Menu and choose Batch Render, Maya will now begin to render your animation, this may take awhile depending on how long it takes to render each frame
  9. When the render is done maya will give a message that says Render Completed in the Mel Script window
  10. When your render is done open your project folder and look in the images folder to see your frames
  11. Open the Fcheck program (located in the autodesk/maya folder in your applications folder) and load the IFF file sequence you just created to check for quality
  12. You may use Fcheck to export a quicktime file, or you can use a program like After Effects to create a video file from your animated sequence
  13. Turn in a quicktime file of your animation and pat yourself on the back! Woo! But wait, your not done!!!!

Monday, February 10, 2020

Getting Oriented to the 3D World of Maya

Hello Students,
Today we begin a new project in using a 3D program to create computer generated imagery. We will be using Autodesk's Maya, a cutting edge program widely used in the entertainment industry. We will begin with the basics and move on to more complex projects such as creating 3D models, and adding lights, textures and cameras and animating them and move on to more complex tasks such as merging video and 3D together with motion tracking.

Tasks: Follow the tutorials below to create the model below:

Maya Basics:
Find and launch Maya on your computer, then open each of the links below if safari. Read through each page of the 3 lessons below and try out the steps for your self in Maya. These lessons will teach you how to use the Maya interface, how to create and manipulate objects and how to control your objects and your view of your objects. Create something with the skills you develop here and save the file as "mayabasics_yourname.ma" and copy it to the external drive to turn it in.

Link: Getting Started with Maya

Link: Creating and Manipulating Objects


Link: Viewing and Controlling your 3D Scene


Tuesday, February 4, 2020

Parallax Effect (Aka: Ken Burns Effect) Project

Hello Students,
AE has some amazing capabilities such as the ability to animate in a 3D space using 2D objects. This method is referred to as 2.5D. This method was made popular by the famous documentarian Ken Burns. The same technique is also referred to as a Parralax effect, which is a technique that shows objects that move against each other from the foreground to the background to create an illusion of depth. This is used in cinema, cartoons, video games and can even be created using HTML5 to add an creative and eye catching feature to websites.


Parallax Project (Aka: Ken Burns Project)
  • Find or take a photograph that you can animate using the 2.5D/Parallax method, this photo should be high resolution, include good amounts of detail and have a good balance of foreground and background, as a rule your photo should have at least twice the resolution of your composition
  • Open your photo in photoshop and create layers for your animation, use selection tools to isolate your foreground subject from the background. If you take your own photo make sure to take a version with no subject so you have a clean background to use and you can skip the next step
  • On the background layer in photoshop use the "fill with content aware" and touch up area with the clone tool where you need to cover up
  • Save your photo as a Photoshop document with your layers ready and import it into After Effects
  • Make sure to click "import as composition" to preserve your layers for use in AE
  • Create a new composition in AE for your project
  • Open your PSD composition and Copy/Paste the layers into your main composition
  • Enable the 3D button for all layers
  • Create a 3D camera for your scene
  • Use the camera manipulator tool to zoom into your Photograph layers and frame your "shot"
  • Using the move tool, select your subject layer and drag it on the Z axis towards the camera a little bit
  • Move the background away and scale up if needed
  • Use the camera manipulator tool to explore the range of motion that looks good, create a set of keyframes for the camera position, then move the playback head to the end of your composition and move your camera inwards and to the right or left in a subtle movement
  • Preview your animation to get the camera/layer position just right
  • Use Ease-In on your last set of keyframes to slow down the motion
  • Add a vignette, tint, depth-of-field effect or other enhancements for full credit
  • Having trouble? Try googling "parallax effect in AE" and look for a tutorial video, there are some very good and easy to follow tutorials online
Due on tuesday, have fun! - Mr.W

Thursday, January 30, 2020

Explore AE: 20 Filter Exercise


Hello Students,
Motion Graphics is a technique that is used to bring graphics, animation and 3D content to life. It is used in commercials, production, movies, animation and more. From the most complicated animated feature film to a simple logo animation, motion graphics makes it happen.

Tutorials - After Effects for Beginners:
Read and work through these tutorials to gain an in-depth understanding of the After Effects workflow. Don't skip any steps or skim over the material, read each and every paragraph and try out the steps yourself. Be thorough, you will be calling on these skills for the next assignment. Work through all, from intermediate to advanced.
Motion Graphics can blur the line between video, art and animation


20 Different AE Effects Assignment Details:
  • Find a short clip from one of your previous projects, output a 3-5 second clip of video from Final Cut. Use the Export > Quicktime function for best results.
  • Launch Adobe After Effects
  • Go to File > Import > Files and navigate to your clip
  • Drag your clip into the timeline and set up a composition
  • Explore the Effects menu, pick one while your clip is selected in the timeline to apply that effect
  • You can use Command-D to duplicate a clip, you can also Option-ClickDrag to make a copy.
  • Use the Text Tool to create a text object and type in the name of the Effect, shorten the Text Objects Layer in the Timeline so it only appears for that specific clip. Repeat for each clip.
  • Apply 20 different Effects to 20 different clips... explore the effects palette to modify the Effect's parameters. 
  • When done, set up your in/out markers and use Command-Control-M to "Make" a movie. You will see the Render Que... hit the Render button to save your movie.
  • Transfer your movie to my laptop via thumbdrive to turn it in
  • Files are due before end of class monday
Grading for a total of 10 points:
2.5 Points - All 20 clips created with effects
2.5 Points - Effects have labels
2.5 Points - Quicktime movie turned in and is proper video format
2.5 Points - File turned in on time

AE Effects Samples:


Have Fun!


 - Mr.W

Friday, January 24, 2020

Modern Motion Graphics: Introduction to Animation with Key Frames in AE

Hello Students,
To re-inforce our newly developing skills in After Effects (AE) we will revisit the effects and animation tutorial to create a short series of sample animations that demonstrate different capabilities in AE.

Tutorial Link: AE for beginners - effects and animation

Animation Basics Project:
In this project you are required to read the tutorial link above and create examples of different methods and techniques of animating with AE. Your animation should use simple solid shapes or images, the key is to simply demonstrate each technique listed below. Keep your sample animations short and to the point. Total running time for project should be kept under 2 minutes.

  • Open up the link above in a web page
  • Launch AE and create a new HD composition
  • Create an animation sample using simple solid shapes or images for each of the following listed below
  • Work with your classmates to share information and discoveries
  • When complete export your sample animation movie and turn in to the external HD
  • If you are unsure refer to the tutorial page, it lists all the methods to create these samples

Create a sample key framed animation that demonstrates the ability to transform:

  • Position
  • Opacity
  • Scale
  • Rotation


Create a sample animation that demonstrates the ability to alter the velocity of a keyframe:

  • Easing into a keyframe, to slow down
  • Easing out of a keyframe, to begin slowly and speed up


Create a sample animation that demonstrates:

  • Parenting of 2 objects
  • 2-3 objects that overlap each other and show blending modes applied to change how objects blend together
  • A masked object
  • A masked object with a feather applied to the mask
  • A masked object where the mask is animated


Tuesday, January 21, 2020

Traditional Animation Origins: Thaumatropes and Phenakistoscopes

Hello Students,

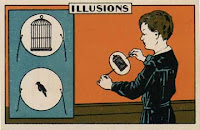
Your next module is a physical exercise in creating examples of the earliest forms of animation. This module will create an understanding the illusion that makes animation possible, this is called "Persistence of Vision".

Animation History Project 1: Creating a Thaumatrope

5 Minute Research Exercise: 
  • Who was Ptolemy? What did they observe about optics?
  • Who invented the Thaumatrope?  What year was the Thaumatrope invented?
  • Who Studied the "Fusion of Colors" and what other discovery did this person make?
  • What visual phenomenon does the Thaumatrope demonstrate?
  • Name 2 other Victorian era animation methods and describe how they work.
  • Make a thaumatrope using the materials available
  • Think of an interesting 2-frame animation idea and create a handmade thaumatrope device, it can be created digitally and printed out or by drawn by hand
  • You will turn in a physical example of your thaumatrope.
  • Due at end of class today!

Animation History Project 2: Creating a Phenakistoscope

Practice:

  • Download 2-3 examples from an online resource such as: publicdomainreview.org
  • Use the Instructions below to create an animated version in After Effects. You will need to count the number of frames to create the correct number of rotations and frames in your After Effects composition, experiment to figure it out... 


Make your own:


  • Create a phenakistoscope using the materials available.
  • Follow the lesson details outlined in the CTEOnline curriculum for creating a "Spindle Viewer". This lesson contains a template which may be printed and used.
  • Think of an interesting 16 frame animation, it should be able to loop seamlessly if you are successful.
  • Your animation can be drawn by hand, created digitally or with photographs, your imagination and skill level is the only limit.
  • You will turn in a physical example if your phenakistoscope along with an animated GIF file of your phenakistoscope. We will learn how to make animated GIF's with Photoshop before you turn it in.

Phenakistoscope Instructions
  1. Obtain or print up a copy of the phenakistoscope template.
  2. Sketch your animation very lightly in pencil, make sure to keep your artwork consistent and evenly spaced for best results. Make sure the scale of your characters or artwork is consistent.
  3. Spin your template for a quick preview of what your animation will look like, adjust lines or artwork if needed.
  4. Once the artwork is complete, ink the sketched artwork with a dark pen. Felt tip pens are best but any will work. Make sure the lines are bold and easy to see for best results.
  5. Scan your template with the scanner and transfer to your computer.
  6. Open your scanned image with adobe photoshop.
  7. Create a new layer and set the blending mode to darken. On this layer paint color over your artwork with a brush/pencil tool. The blending mode "darken" will allow your line art to show through the color you added.
  8. When the color layer is complete flatten your image to make the color and artwork into a single layer. Save a copy of this to preserve your original layered file.
  9. Open your flattened image and open the animation palette in photoshop, set the palette to work in frame mode.
  10. Create 16 layers of your template, rotating each layer so that it is aligned and ready for animation..
  11. In the animation palette sub menu, select "make frames from layers" and your layers will be cast across the timeline in the animation palette..
  12. Adjust your duration and delete any frames that don't belong.
  13. Hit the play button to see your animation, adjust speed/duration if necassary..
  14. Export a GIF files to make an animated web safe file..
  15. Make sure the GIF looks good and is set to loop "forever"...
  16. Make sure you add your first and last name to the file and email or airdrop it to your instructor.

Have fun! - Mr.W

Semester Conclusion

Thank You Video Production Class of 2019
Thank you to all my great students from this years Video Production and Animation class. There were some very impressive portfolios and projects and I thank you all for your hard work and dedication.


This blog will go live again for the Spring semester 2018-19. See you then!

- Mr.W